Chapter 2. Console Design & Components
Linked files:
Welcome to the second installment of our series on the development of Pinect, a hand-free console for gamers. In our previous post, we explored the algorithm behind the recognition of a gamer stream for use with the console. In this post, we will delve into the design and components of the finished device.
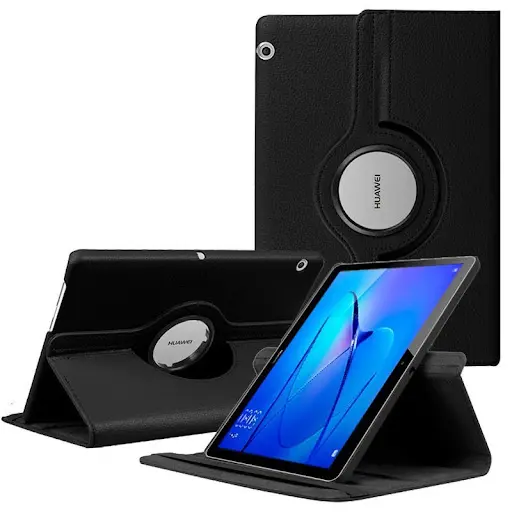
As I mentioned before, an Android device is the heart of the Pinect console. It serves as the computing center, calculating the position of the gamer stream and running the game that utilizes this information. When I first started working on the Pinect console back in 2018, the Mediapad M3 tablet was the most cost-effective option for an Android device with a large screen and the necessary processing power.
However, technology moves quickly and now there are many other options available for your hand-free console. Modern tablets, smartphones, Android boxes, and even Android SmartTVs can all be used, as long as they have a few processor cores and a USB socket.
When designing the Pinect hand-free console, I wanted to ensure that it would be as convenient and easy to use as possible for gamers. One way I achieved this was by using an external USB camera rather than relying on the built-in camera of the Android tablet I were using as the computing center.
By using an external camera, I was able to place the tablet screen and the camera independently, allowing for more flexibility in terms of positioning and angle. This meant that gamers could set up the Pinect console in a way that was most comfortable and convenient for them, rather than being limited by the fixed placement of a built-in camera.

To find an affordable and reliable camera, I turned to AliExpress and found a common 0.3MP USB camera that fit the bill. While the resolution of 640 by 480 may not be the highest, it was more than enough for the recognition algorithm I were using. By prioritizing functionality over sheer resolution, I were able to keep the cost of the Pinect console down while still achieving the performance I desired.
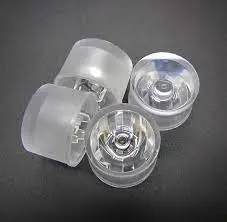
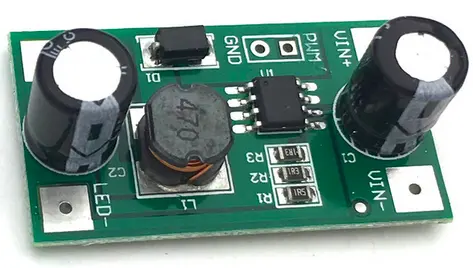
I wanted to ensure that the camera I used would be able to capture clear and detailed images of the gamer stream. To achieve this, I decided to use a 1 Watt LED with the lens of the camera.
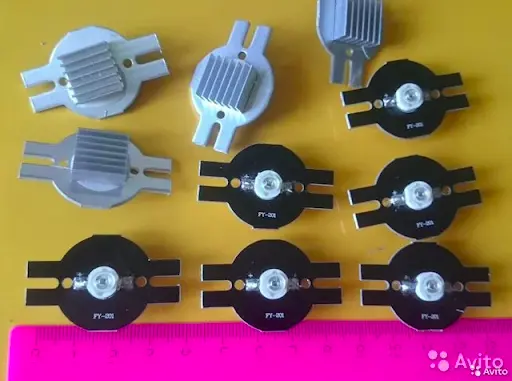
The LED is powered by this LED driver:
Note: The above components are sufficient for minimal functionality of the game controller. You can run the pinect software using only these parts. However, the below components are additional parts that can be used to automate various tasks for a more advanced experience.
When all these components are all packed inside a box, it’s not uncommon for the temperature inside the box to rise over time. To prevent overheating and ensure optimal performance, it’s important to monitor the temperature inside the box and cool it as needed.
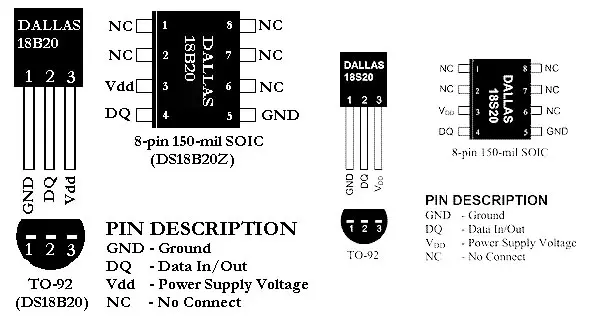
To achieve this, I added a temperature sensor and a fan to the Pinect console. Specifically, I used the DS18B20 digital temperature sensor for temperature monitoring, and a common CPU fan for cooling. The temperature sensor is able to continuously monitor the temperature inside the box and alert us when it reaches a certain threshold, at which point the fan can be activated to bring the temperature back down.
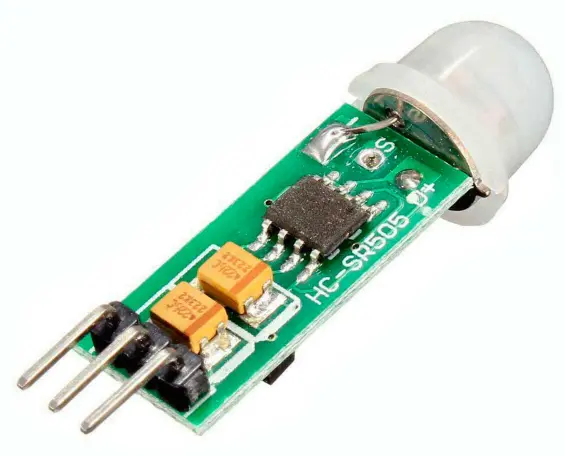
In our efforts to create a convenient and user-friendly device, I wanted to ensure that the device was ready to go as soon as a gamer approached it. To achieve this, I added a motion sensor to the Pinect console that would be able to detect movement and automatically wake up the device. This way, gamers wouldn’t have to waste time waiting for the device to power on and the game to load – they could simply start playing as soon as they arrived.
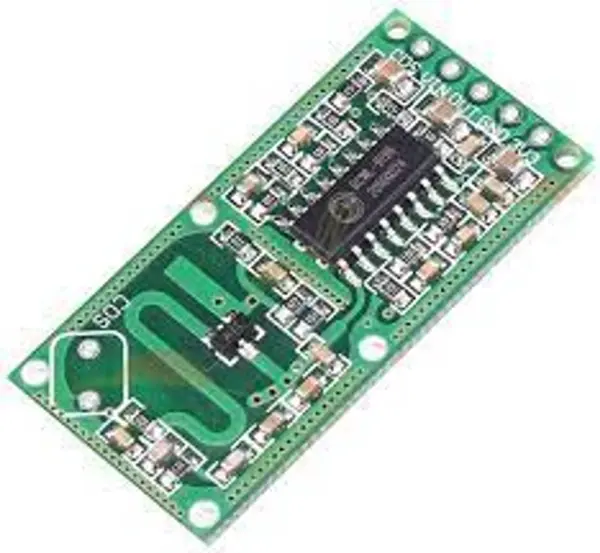
To ensure reliability, I decided to use two independent motion sensors in different technologies. Specifically, I used the RCWL-0516 Doppler Radar Sensor and the HC-505 PIR sensor. These two sensors work together to provide high reliability and ensure that the Pinect console is ready to go as soon as a gamer approaches.
Of course, it’s worth noting that you could potentially use just one of these sensors and still achieve good results. However, by using two independent sensors, I was able to add an extra layer of reliability to the design of the Pinect console.
Ok, let’s see what we got
- Tablet Huawei MediaPad M3 10”
- USB camera 0.3MP
- LED with driver
- Two motions sensor
- Temperature sensor
- Fan
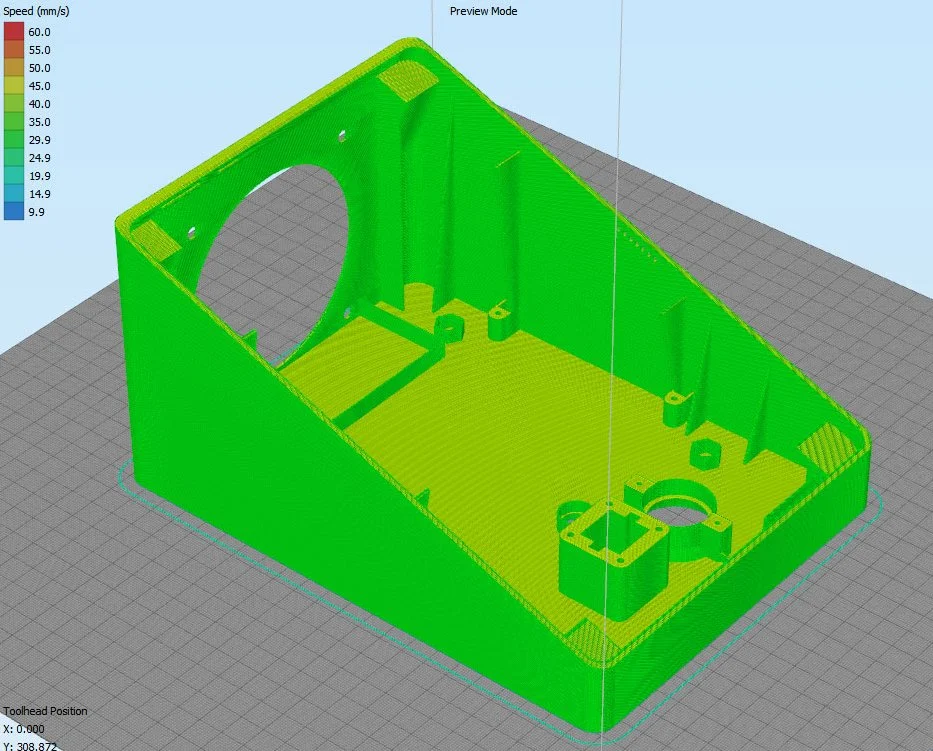
In addition to the various components we’ve discussed so far, it was also necessary to develop a board based on microcomputers in order to supply power and control the various devices used in the Pinect hand-free console. The design of the board and its software are topics that we’ll be exploring in a future post. For now, let’s turn our attention to the case that will contain all of these electronic components. One option I considered was using 3D printing technology to create a custom case for the Pinect console. 3D printing has come a long way in recent years and is now more accessible than ever, making it a viable option for creating a case for our device.
You can download 3d model here. STL format
Using 3D printing for the case has a number of benefits. It allows for a high level of customization and flexibility in terms of design, and it can also be a cost-effective way to produce a case in small quantities.
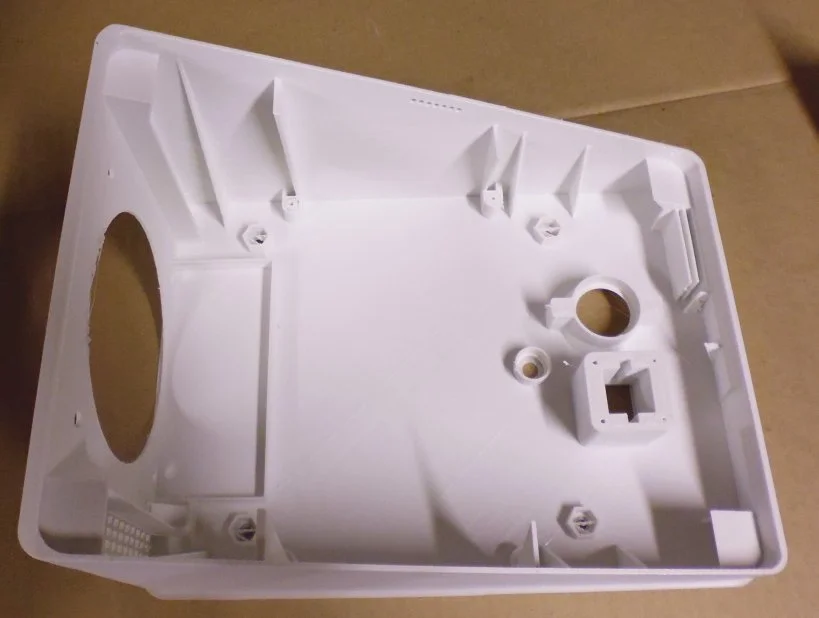
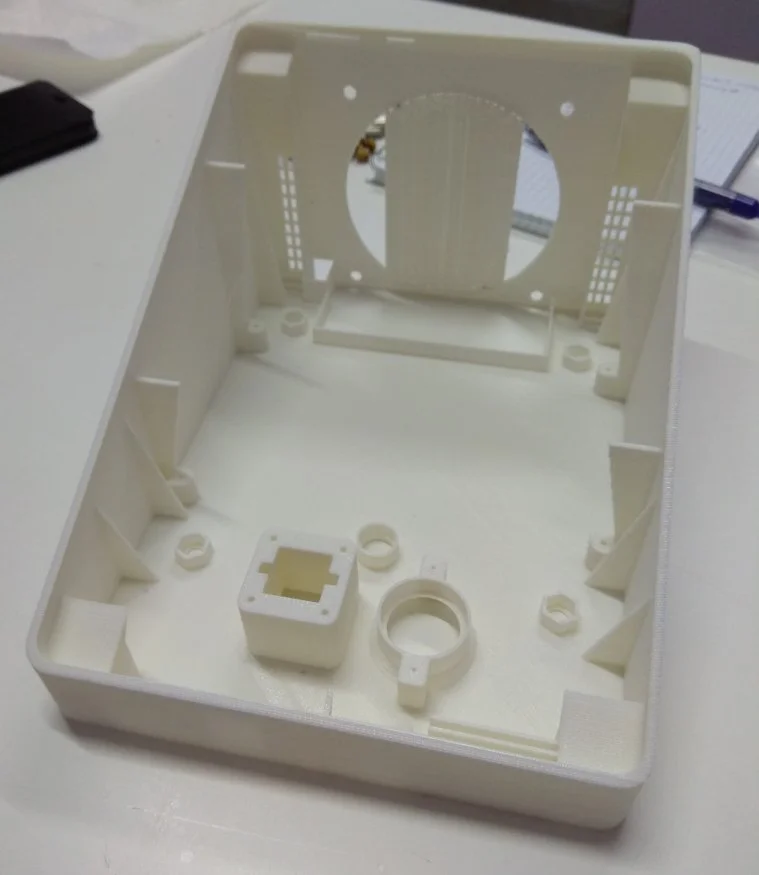
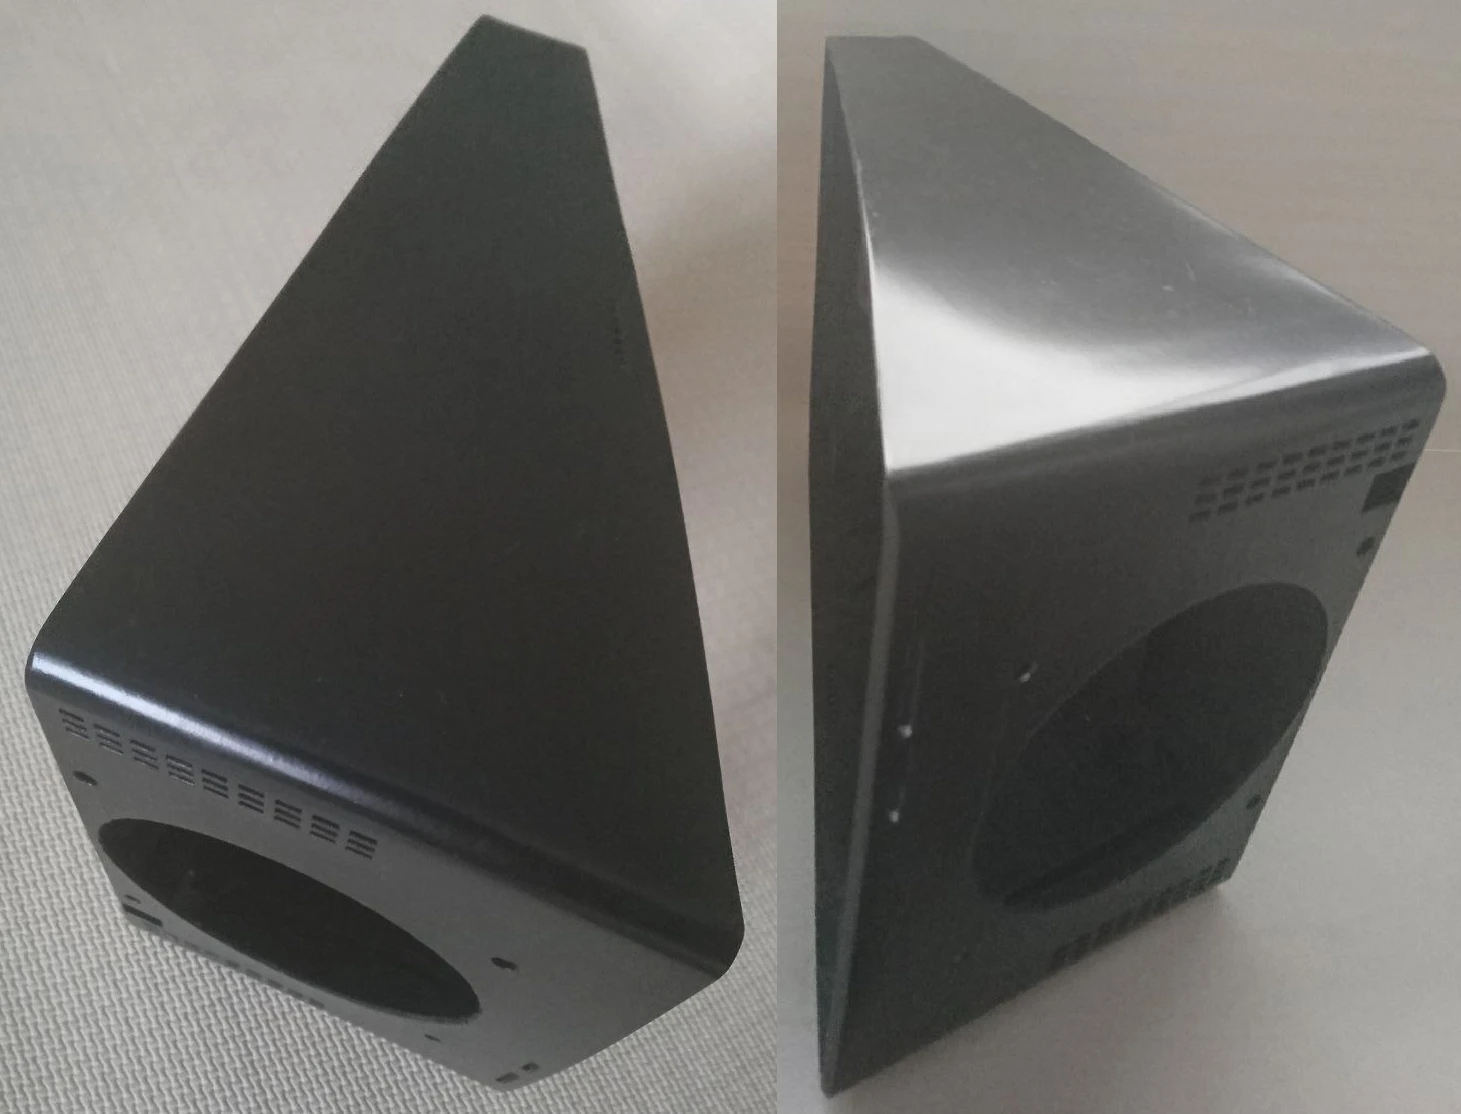
The case I designed for the Pinect console was a single component made from PLA or ABS filament. I chose a seamless design for a more polished and professional look. The surface of the case was also easy to prime and paint, which was a useful feature.
However, one potential drawback of using 3D printing for the case is that the walls of the object can be relatively thin. In our case, I found that the printing process took a significant amount of time – at least 12 hours in 2018 – and I had to experiment with various designs to find the optimal case shape. In the end, I was able to reduce the printing time by reducing the width of the walls, but this also meant that the case was not as strong as it could have been.
To improve the strength of the case, I considered using Epoxy resins to reinforce the walls. Like this:

To address this issue, I considered using Epoxy resins to reinforce the walls of the case. Epoxy resins are a type of polymer that can be used to add strength and rigidity to 3D printed objects. When used in combination with PLA or ABS plastic, they can provide greater strength than the materials used on their own.
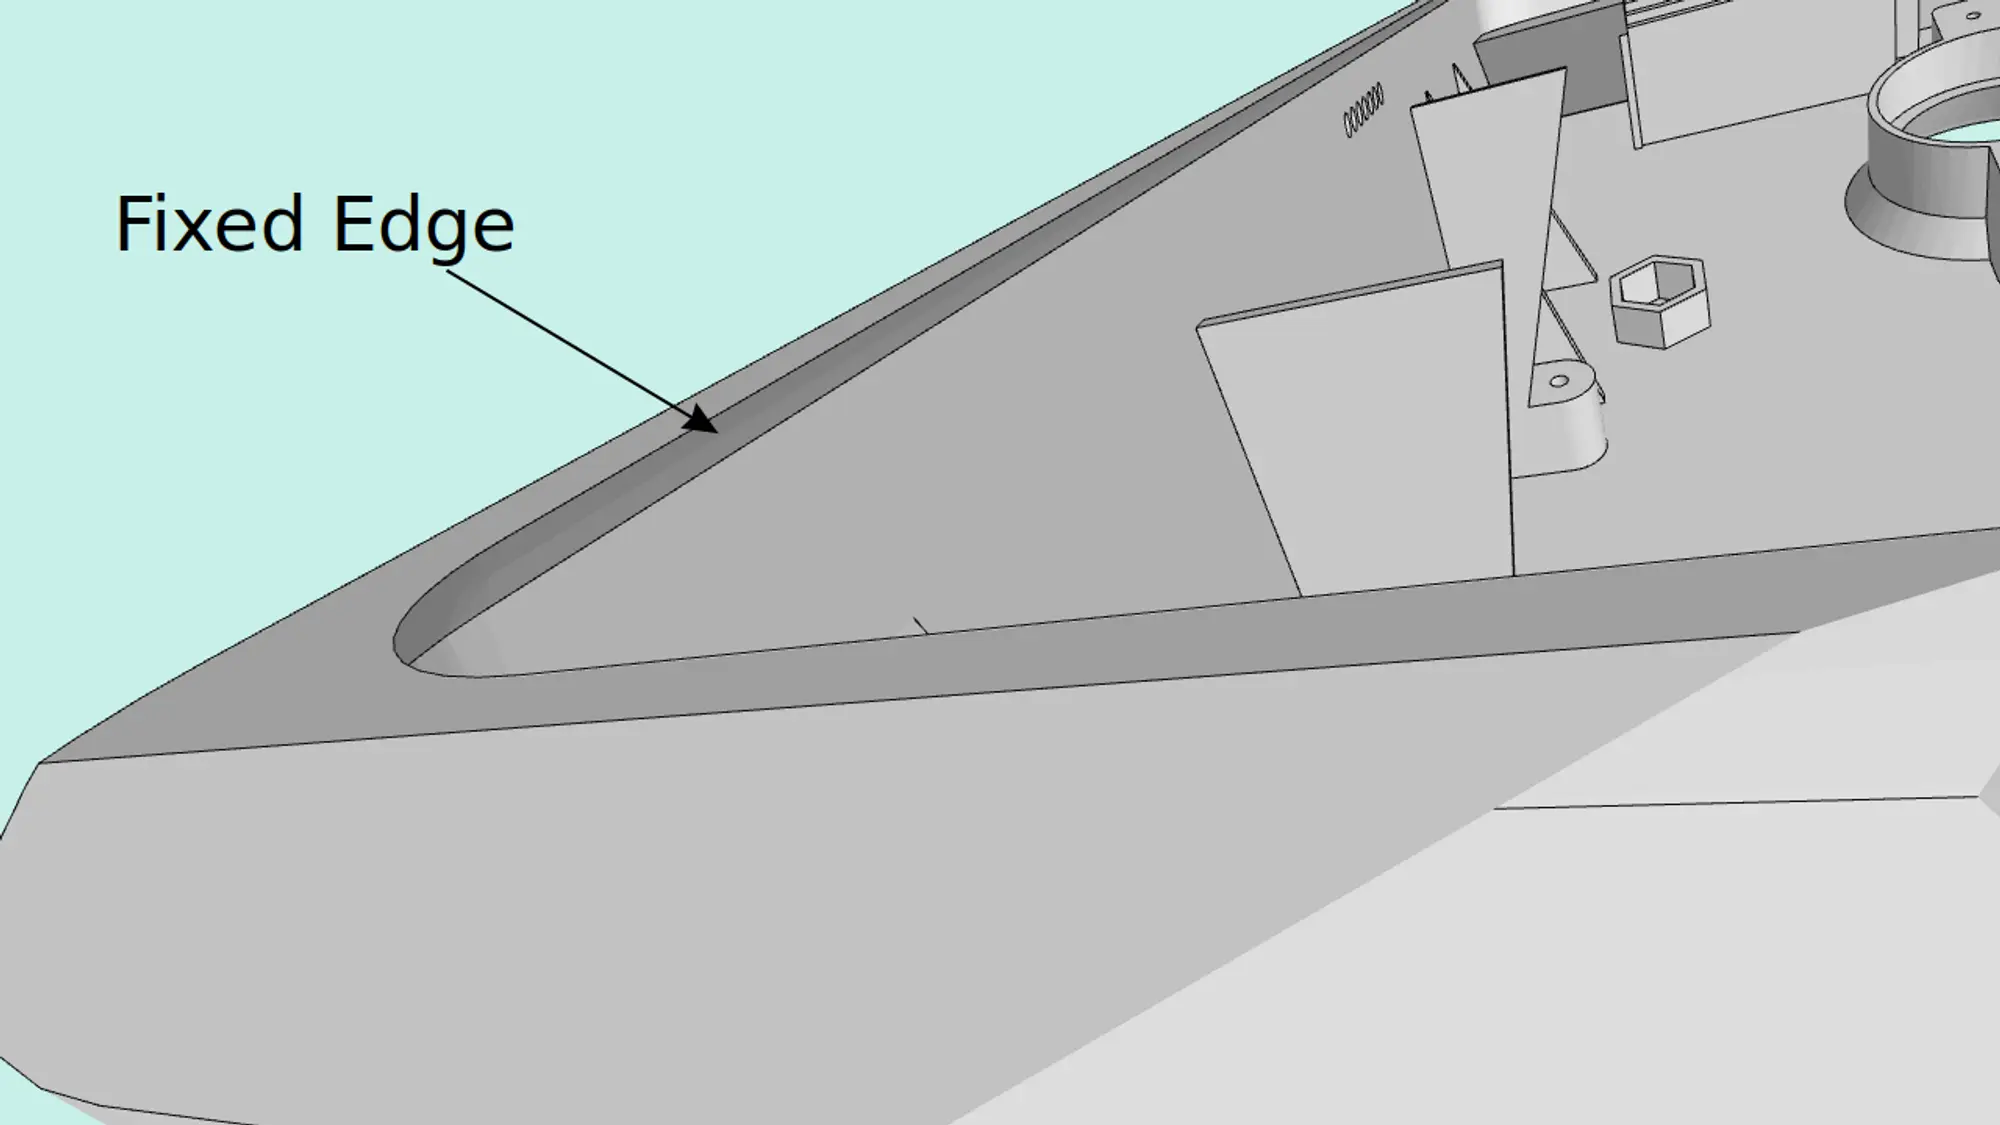
For the electronic parts of the Pinect console, I used screws to fix them in place. This provides a secure and stable attachment that can withstand the normal forces and vibrations that the device may encounter during use. The sensors, on the other hand, were fixed with glue. Using glue for mounting the sensors was also a fast and cost-effective way to assemble the device. The Android tablet used in the Pinect hand-free console was mounted on the box in a state of resiliently extended deformation. This meant that the tablet was stretched slightly and held in place by fixed edges that were supported on the box. This provided a secure and stable attachment without the need for additional parts or hardware.
It looks better in the 3D model:
I soon realized that this approach had some limitations. Specifically, standard USB sockets are not particularly robust and can be prone to disruptions. To address this issue, I decided to unmount the USB sockets from the tablet’s board and camera and instead connect the two devices using USB wires that were soldered together. This provided a more stable and reliable connection that was less prone to disruptions.
 android tablet without usb socket
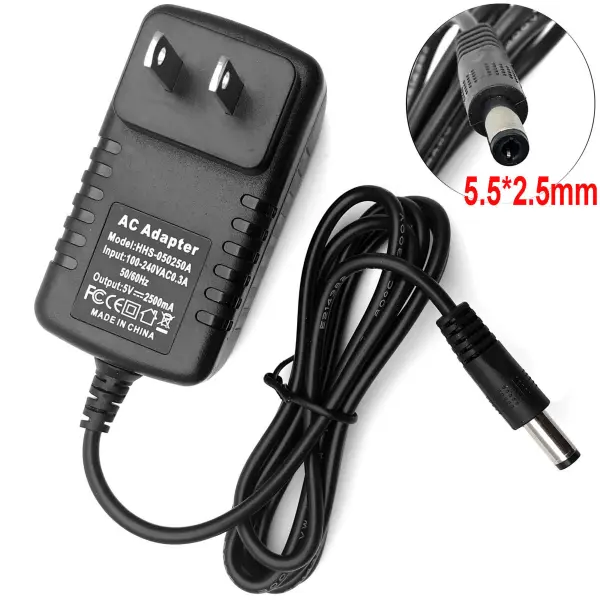
To power the various electronic components of the Pinect hand-free console, we needed to use a 5V power supply. This is a common voltage that is widely used in electronic devices, so we had a number of options to choose from in terms of power sources.
In order to power all of the electronic components of the Pinect console, we needed either an AC or DC power adapter that could provide at least 2.5A of current. This would ensure that we had enough power to run all of the devices and avoid any issues with insufficient power.
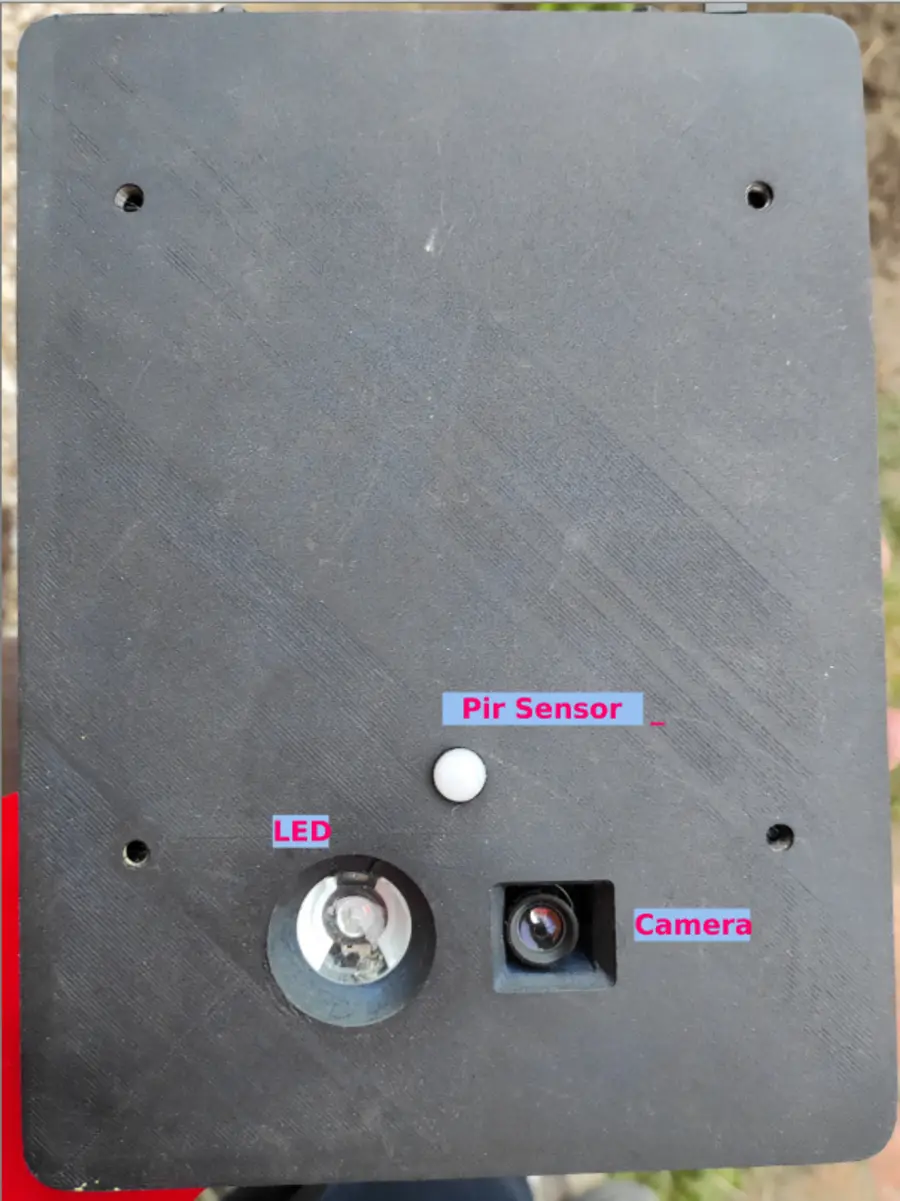
This pictures show the final assembly of the electronic parts:
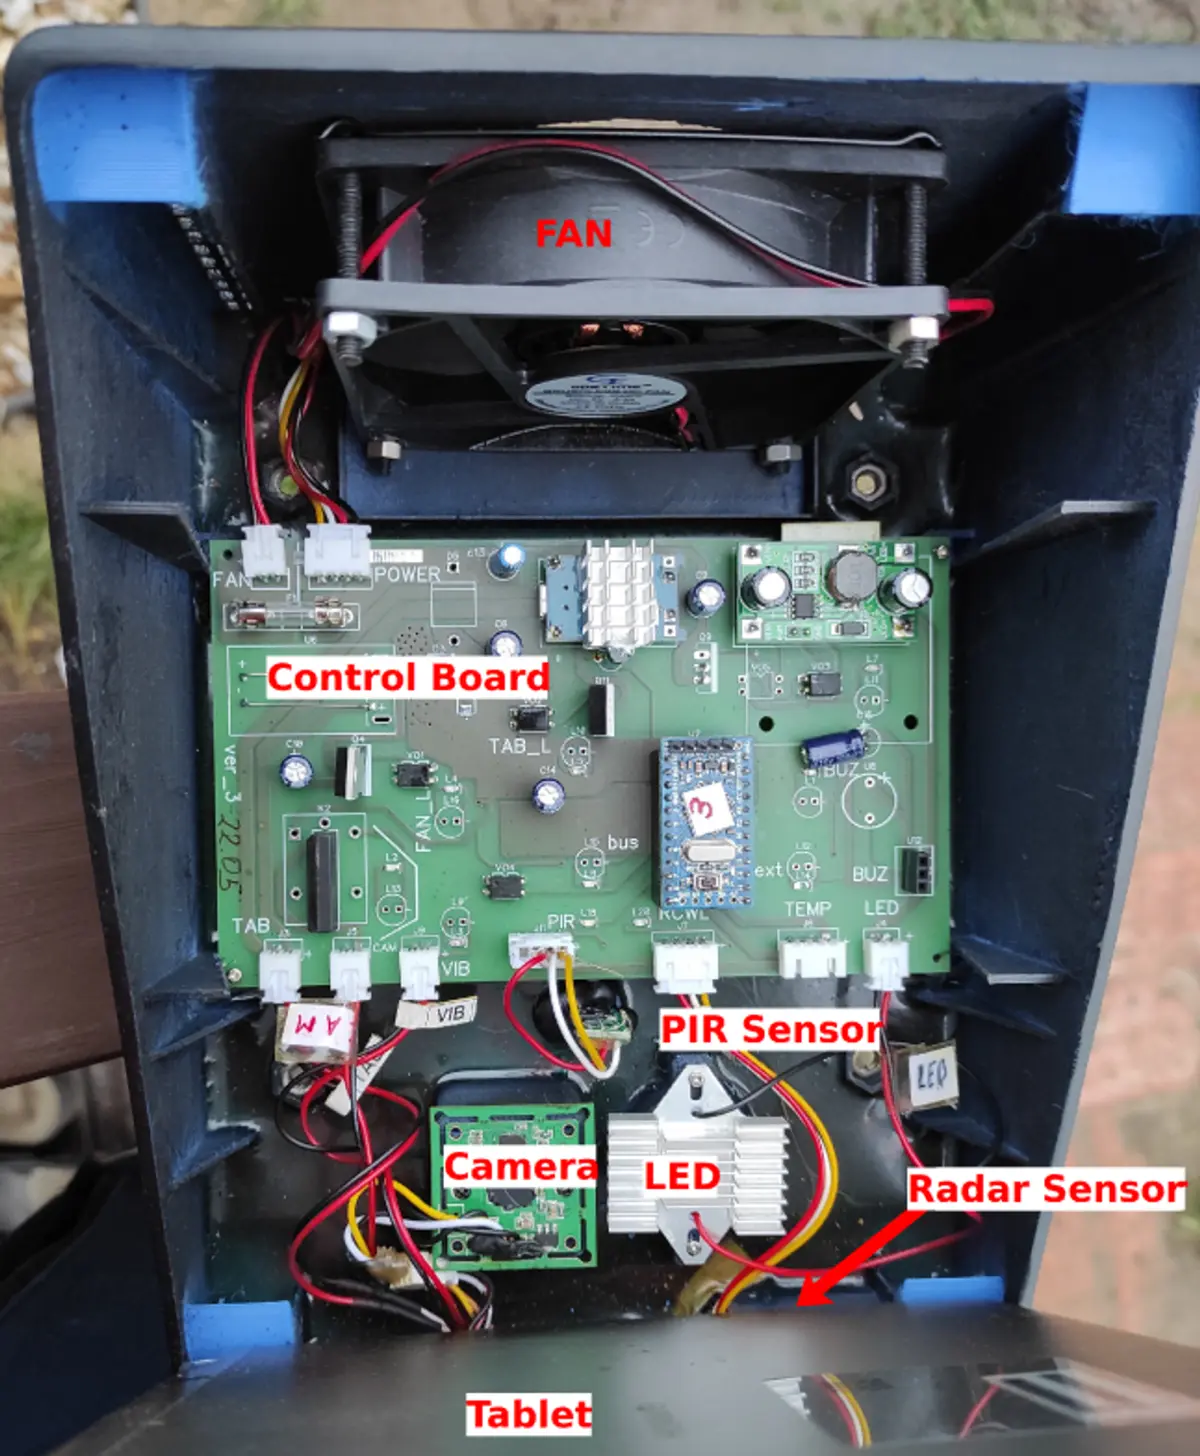
Button view:
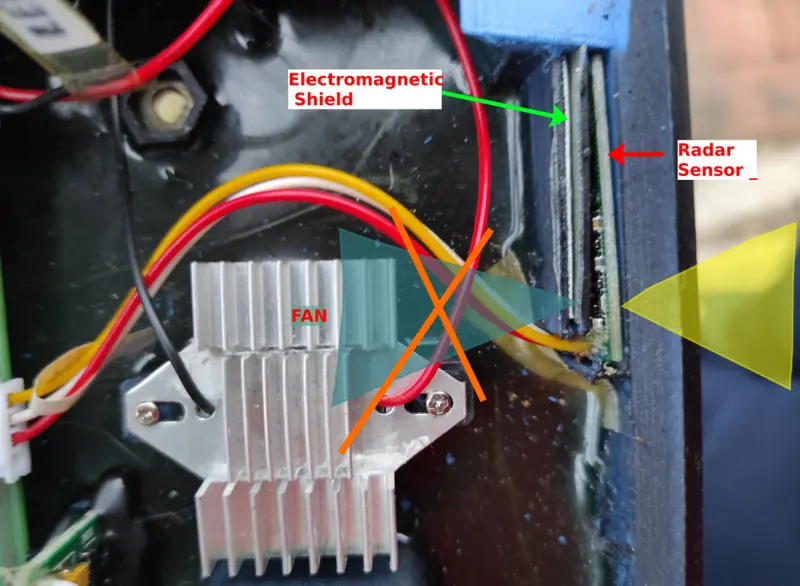
The Pinect hand-free console avoids false positives due to fan rotation, and the electromagnetic shield also serves to limit the visibility of the radar. The shield blocks or absorbs a portion of the radar signal, which reduces the radar’s overall visibility.
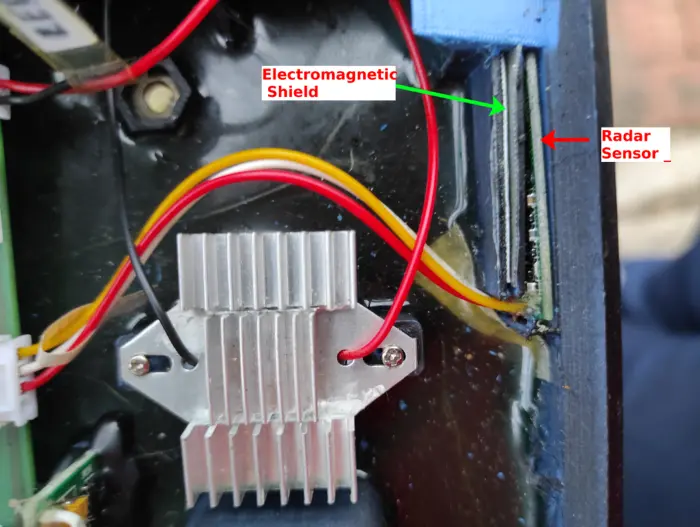
In this case, the visibility of the radar is reduced to less than 60 degrees. This means that the radar can only detect motion within a relatively narrow field of view. This is useful in situations where you want to monitor motion activity in a specific direction, while ignoring activity in other directions.
Mounting holes are the nuts that are fixed at the base of the case with glue.
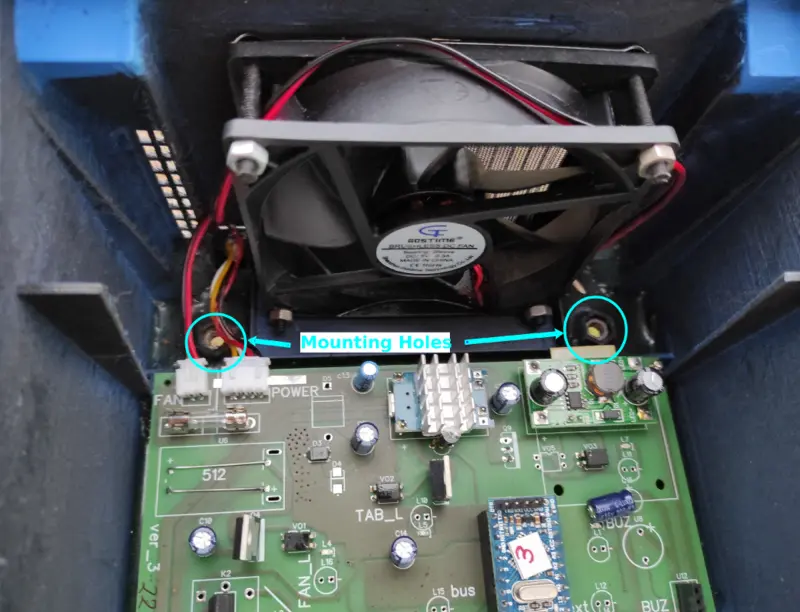
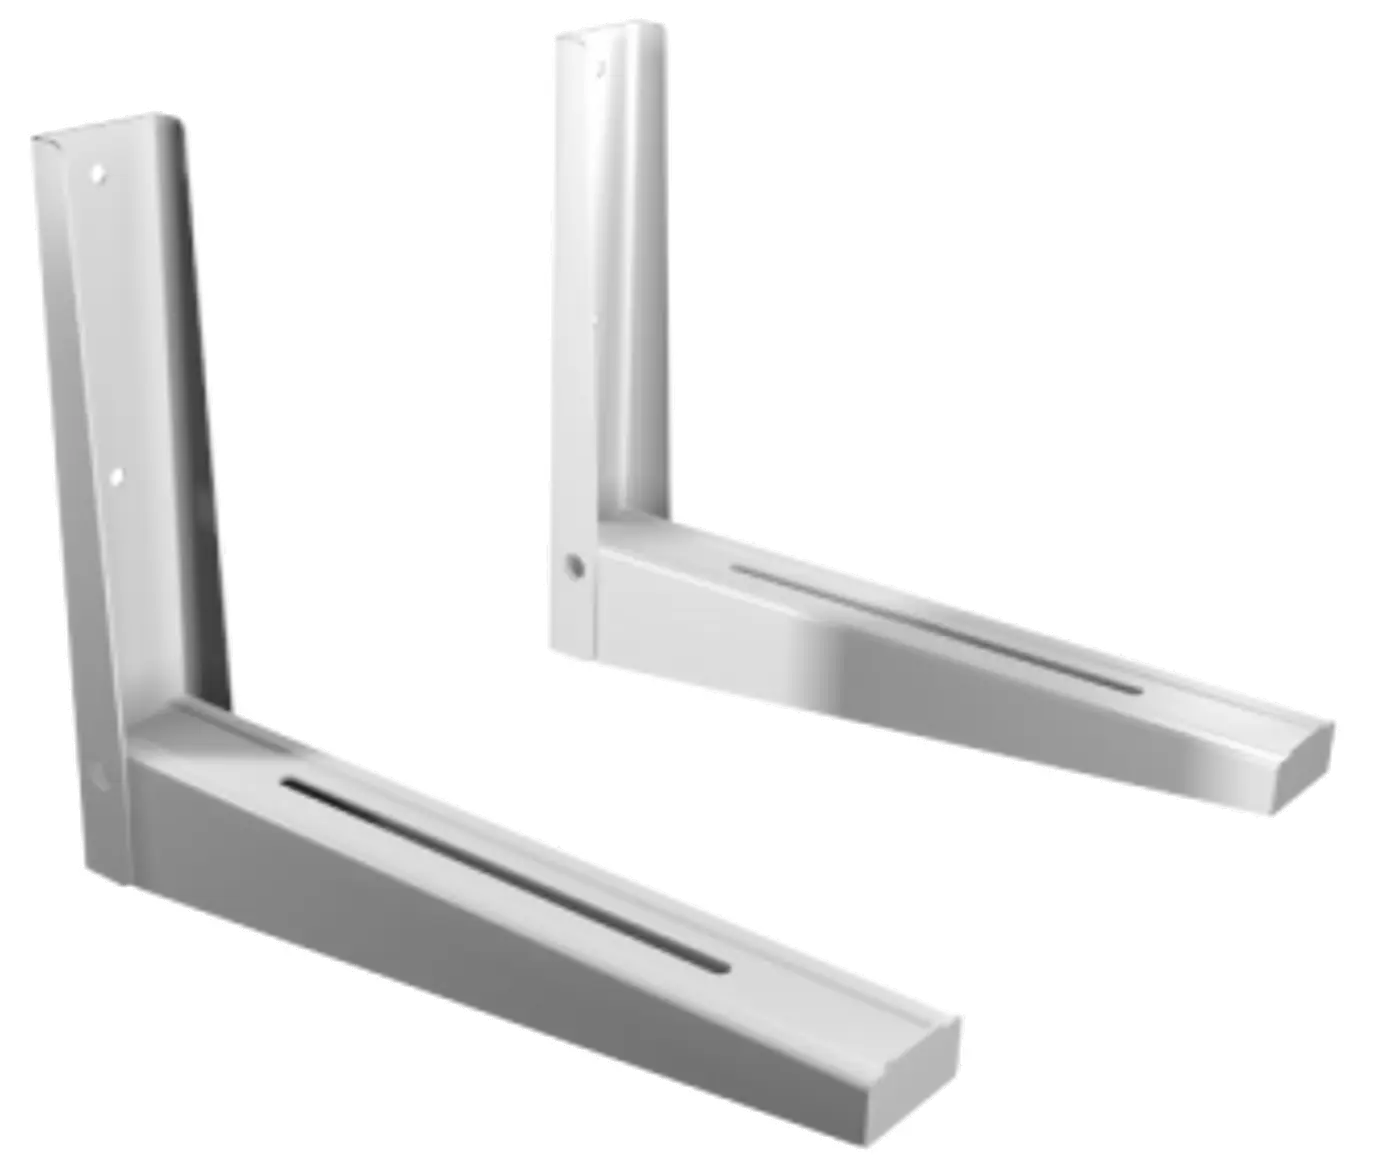
They are designed to attach the case securely to the bracket.
This is a normal bracket for microwaves, well known to every housewife.
There are a number of reasons why I might choose to finish a 3D-printed case, such as the one used in the Pinect hand-free console. Some of the main benefits of finishing a 3D-printed case include:
- Improving its appearance: Finishing a 3D-printed case can help to enhance its appearance and make it look more professional. This can be especially important if the case is going to be used in a public-facing application or if I want to showcase the product to potential customers.
- Increasing its durability: Applying a finish to a 3D-printed case can help to improve its durability by increasing its resistance to heat, corrosion, wear, and other elements. This can be especially useful if the case is going to be subjected to harsh conditions or if it needs to withstand frequent handling.
- Smoothing out uneven surfaces: 3D printing can sometimes produce parts with uneven or rough surfaces, especially if the printer is not calibrated correctly or if the print material is not of high quality. Finishing the case can help to smooth out these uneven surfaces, making the case feel more polished and professional.
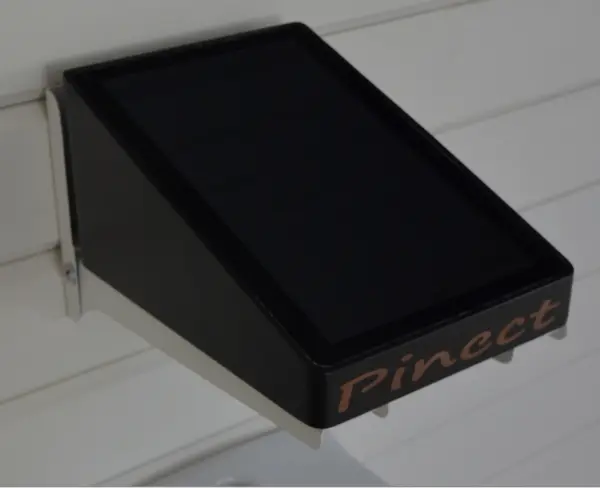
I have post-processed the 3D-printed case in my garage by priming, painting, and polishing it. This should help to improve the appearance and durability of the case, as well as smooth out any uneven surfaces. Overall, finishing a 3D-printed case can provide a number of benefits and help to make the product more professional and high-quality.
Total value was estimated at 200 dollars for 2018.
- Tablet ~ 100$
- 3D printed box ~ 15$
- Control board ~ 40$
- Camera ~ 10$
- Other electronic parts ~ 35$
In the following articles, I will talk about the control board design and the wonderful experience of making the Аndroid arcade game for the Pinect.